NestJSとは
TypeScriptを用いてAPIを構築したいときのフレームワークの一つ。
何もせずに利用し始めるとREST APIが使えるが、
GraphQLのライブラリをいれることによりGraphQLのエンドポイントを作ることが可能。
今回やること
NestJSを用いて、GraphQLが扱えるAPIを構築する。
参考
公式サイトを参考に進める。
![]() Documentation | NestJS - A progressive Node.js framework
Documentation | NestJS - A progressive Node.js framework
サンプルAPI構築
①インストール
公式サイトにあるように、nestコマンドをインストールして
それを利用することでサンプルAPIを簡単に作成できる。
$ npm i -g @nestjs/cli
$ nest new project-name
プロジェクトが作成されたら、プロジェクトのルートで必要なパッケージのインストールを行う。
(今回はyarnの利用を選択した)
$ yarn install②API起動
READMEに記載の通り、以下のコマンドで起動することができる。
$ yarn run start
yarn run v1.22.22
$ nest start
[Nest] 46878  - 2024/06/23 12:34:41     LOG [NestFactory] Starting Nest application...
[Nest] 46878  - 2024/06/23 12:34:41     LOG [InstanceLoader] AppModule dependencies initialized +11ms
[Nest] 46878  - 2024/06/23 12:34:41     LOG [RoutesResolver] AppController {/}: +6ms
[Nest] 46878  - 2024/06/23 12:34:41     LOG [RouterExplorer] Mapped {/, GET} route +1ms
[Nest] 46878 - 2024/06/23 12:34:41 LOG [NestApplication] Nest application successfully started +4ms localhost:3000にアクセスすると、「Hello World!」が返却される。
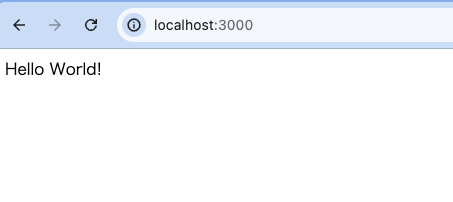
ここまでで、一般的なAPIを立ち上げることができた。
③ディレクトリ構成
srcディレクトリの構成は以下のようになっている。
$ tree src
src
├── app.controller.spec.ts
├── app.controller.ts
├── app.module.ts
├── app.service.ts
└── main.ts

1 directory, 5 files| ファイル名 | 概要 |
| app.controller.ts | APIにおける一般的なController。受け付けるメソッドやパスなどを書く。 |
| app.service.ts | APIにおける一般的なService。ロジックなどを書く。 |
| app.module.ts | NestJSはmoduleという単位で機能を集約する。これはアプリケーション全体を取りまとめるmodule。 |
GraphQLを利用する
ここから、GraphQLを利用できるようにしていく。
参考にする公式サイトは以下の通り。
![]() Documentation | NestJS - A progressive Node.js framework
Documentation | NestJS - A progressive Node.js framework
- コードを書いて、そこからスキーマを生成していく方法
- スキーマをベースに実装していく方法
という2通りの方法があるが、今回は1の方法で実装を進める。
①必要なパッケージをインストールする
$ yarn add @nestjs/graphql @nestjs/apollo @apollo/server graphql②moduleを作成する
moduleとは、機能をひとまとめにする単位のこと。
ここから、Authorというオブジェクトを作成し、それをGraphQLで提供する実装をしていくが
このAuthorに関する実装をひとまとめにしておく場所になる。
自動生成してくれるコマンドがあるので、こちらを利用して自動生成する。
$ nest g module author authorというディレクトリが作成され、author.module.tsが生成されていることが確認できる。
src
├── author
│   └── author.module.ts
③modelを作成する
moduleを作成するとauthorディレクトリが作成されるので、
その中にAuthorオブジェクトのmodelを作成してく。
これが、レスポンスオブジェクトのベースの形になる。
src/author/author.model.ts
import { Field, Int, ObjectType } from '@nestjs/graphql';

// オブジェクト全体に対してdescriptionを記載することもできる
@ObjectType({ description: 'Authorオブジェクト' })
export class Author {
  // GraphQLには数値型はIntとFloatがあるので、Int利用を明記する
  @Field((type) => Int, { description: 'ID' })
  id: number;

  // descriptionにより、フィールドに関する説明を記載できる
  @Field((type) => String, { description: '名前' })
  name: string;

  // nullableの場合もここで指定する
  @Field((type) => Int, { nullable: true, description: '年齢' })
  age?: number;
} @ObjetcType()を付与したクラスを作成し、そこにフィールドを記載する。
各フィールドには@Field()デコレータを用いて、フィールドに関する付加情報を記述する。
④resolverを作成する
resolverにはクエリに関する振る舞いを定義する。
レスポンスはどんな形か、リクエストできるパラメータは何か、どんなクエリを受け付けているかなどを記載する。
src/author/author.resolver.ts
import { Args, Int, Query, Resolver } from '@nestjs/graphql';
import { Author } from './author.model';

// Authorに相当するスキーマを返却することを宣言している
@Resolver((of) => Author)
export class AuthorResolver {
  // わかりやすさのため、データをベタ書き
  private authors: Author[] = [
    {
      id: 1,
      name: 'hoge',
      age: 10,
    },
    {
      id: 2,
      name: 'fuga',
    },
    {
      id: 3,
      name: 'piyo',
      age: 20,
    },
  ];

  // Authorの配列を返却することを宣言している
  // descriptionにより説明文も記載可能
  @Query((returns) => [Author], { description: 'Authorを全て取得する' })
  async getAuthor() {
    return this.authors;
  }

  // Authorを単体で返却することを宣言している
  // nullableのオプションをtrueに設定しているため、Authorオブジェクトもしくはnullが返却されることがわかる
  @Query((returns) => Author, {
    nullable: true,
    description: 'ID指定でAuthorを取得する',
  })
  // `id`というInt型の引数をリクエスト時に指定することで、idを使った絞り込みが行えることを明示している
  async findAuthor(
    @Args('id', { type: () => Int, description: '絞り込み用のID' }) id: number,
  ) {
    return this.authors.find((item) => item.id === id);
  }
}
⑤moduleにresolverを記載する
作成したresolverは、moduleに記載して、moduleとしてまとめる対象としておく。
src/author/author.module.ts
import { Module } from '@nestjs/common';
import { AuthorResolver } from './author.resolver';

@Module({
  providers: [AuthorResolver], // ここに追加
})
export class AuthorModule {}
⑥ルート要素のmoduleに追加
全体を取りまとめているapp.module.tsに
- GraphQLを利用すること
- 先ほど作成したAuthorに関するmodule
を明記する。
app.module.ts
import { Module } from '@nestjs/common';
import { AppController } from './app.controller';
import { AppService } from './app.service';
import { GraphQLModule } from '@nestjs/graphql';
import { join } from 'path';
import { AuthorModule } from './author/author.module';
import { ApolloDriver } from '@nestjs/apollo';

@Module({
  imports: [
    // GraphQLを利用する際はこれを追加
    GraphQLModule.forRoot({
      driver: ApolloDriver,
      autoSchemaFile: join(process.cwd(), 'src/schema.gql'), // コードファーストで実装しているので、スキーマは自動生成される
      sortSchema: true,
    }),
    AuthorModule, // 作成したmoduleをここに記載
  ],
  controllers: [AppController],
  providers: [AppService],
})
export class AppModule {}
最終的なディレクトリ構成は以下の通り。
$ tree src
src
├── app.controller.spec.ts
├── app.controller.ts
├── app.module.ts
├── app.service.ts
├── author
│   ├── author.model.ts
│   ├── author.module.ts
│   ├── author.resolver.spec.ts
│   └── author.resolver.ts
└── main.ts
動作確認
①サーバー起動
以下のコマンドを実行することで、サーバーを起動できる。
起動した際に、src/schema.gqlというファイルが自動生成されていればOK。
$ yarn run start:dev src/schema.gql
# ------------------------------------------------------
# THIS FILE WAS AUTOMATICALLY GENERATED (DO NOT MODIFY)
# ------------------------------------------------------

"""Authorオブジェクト"""
type Author {
  """年齢"""
  age: Int

  """ID"""
  id: Int!

  """名前"""
  name: String!
}

type Query {
  """ID指定でAuthorを取得する"""
  findAuthor(
    """絞り込み用のID"""
    id: Int!
  ): Author

  """Authorを全て取得する"""
  getAuthor: [Author!]!
}
descriptionに記載した内容が反映されつつ、GraphQLのスキーマが自動生成されていることがわかる。
②playground確認
http://localhost:3000/graphqlにアクセスすると、GraphQLのplaygroundを確認することができる。
SCHEMAタブにはスキーマに関する情報が出力されており、GraphQLのクエリも実行することができている。
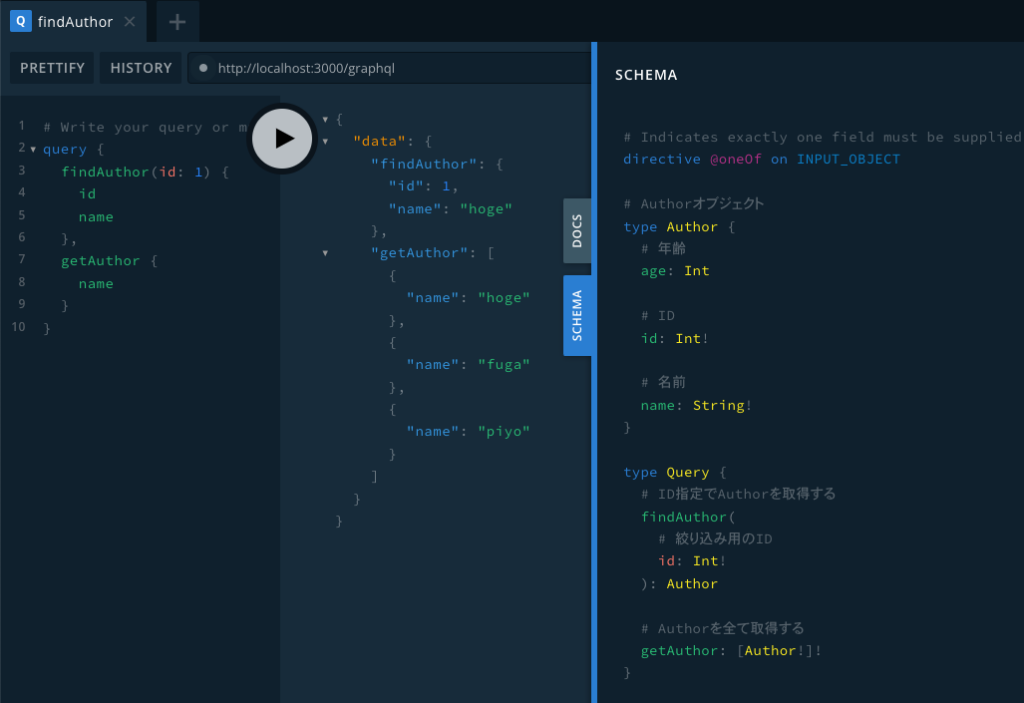
descriptionを記載しておくことで、スキーマの説明が分かりやすくなるので
できる限り記載するクセを身に着けておくと良い。
まとめ
- NestJSはAPIを構築するためのフレームワーク
- NestJSは作ったものをmoduleという単位でまとめておくのがルール
- GraphQLのライブラリを組み込むことで、GraphQLに対応させることができる
- GraphQLではObjectTypeでデータ型を定義し、Resolverでクエリを処理する